Showing posts with label scratch. Show all posts

Waste Not Want Not Chicken Stock

When we started buying organic protein, I was overwhelmed at the price. $17 for a whole chicken? Really? After I got over the sticker shock, I realized that if I utilized the entire bird, $17 wasn't too bad after all. For that $17, I get one dinner (for 4), two lunches and 6-8 cups of chicken stock (which will turn into 2 family dinners worth of soup later). When I start to do the math on a per serving basis (in this example, $1.22 per serving) the price becomes a lot more palatable.

As I make a lot of soup during the fall and winter (I love making soup: dump in ingredients, stir, walk away), chicken stock made from the carcass was the logical thing to do. I used to purchase Trader Joe's Chicken Broth, which contains 600 mg of sodium per 1 cup serving. That is 25% of your daily sodium intake in one cup of soup! My stock has no added sodium, although I suspect there will be some small amount of sodium present due to residual seasoning. The broth is flavorful and colorful, the later from the addition of onion peel (yes, the peel). You can either strain off and use just the stock or you can pick the carcass and use the meat (I only do this when I am making chicken noodle soup but I leave the decision up to you).

Waste Not Want Not Chicken Stock (makes approximately 8 cups)

1 chicken carcass (from a roasted chicken)
2 medium carrots, roughly chopped
1 onion, unpeeled, roughly chopped
8 cups water

Add chicken carcass to large stock pot. You want to totally submerge the bird in water, so if you may need to break the carcass in pieces depending on the size of your pot. Add the carrots, onions and water. Set over high heat and bring to boil. Reduce heat to medium. Cook at a low boil for 1 hour. Remove from heat and let cool. Once cooled, strain the liquid from the pot into a large zip top bag. Label and freeze for later use.

The SG Challenge Part 2 - Pumpkin Black Bean Chili

A few weeks ago I asked everyone to vote on what new black bean recipe I should make. The winner was Pumpkin and Black Bean Chili and I was ready to go with the recipe. Then summer reappeared. Now, I am not complaining about 75+ degree days in October, but that is definitely not chili weather. Yesterday, fall finally arrived and tonight so did the chili.

You'd never know that there is pumpkin in this chili if you didn't see it go into the pot. The remaining ingredients alone would make a fairly light flavored chili, so that is where the pumpkin comes in. It adds a richness and a depth of flavor to the pot that would be sorely lacking without it.

The recipe is adapted from this recipe found at Taste of Home.

Pumpkin and Black Bean Chili (makes 8 - 10 generous servings)

1 medium onion, diced fine
1 yellow bell pepper, diced fine
1 1/2 lb ground turkey
3 cloves garlic, minced
2 T olive oil
1 C low sodium chicken stock
2 cans (or 4 cups) black beans, rinsed
1 can (15 oz) solid packed pumpkin
1 can (28 oz) diced tomatoes, undrained
2 t dried parsley flakes
2 t chili powder
1 1/2 t dried oregano
1 1/2 t ground cumin
1 1/2 t salt
1 t black pepper

In a large skillet, saute onion, pepper and turkey until cooked through, about 8 minutes. Add garlic and cook 1 minute longer. Transfer to slow cooker.


Be sure to cook off all of the liquid from the onions and peppers.


Add the remaining ingredients to the slow cooker. Stir to combine well.


Everybody in the pool.


Cook on low for 5 - 6 hours or until heated through and bubbly. Serve with sharp cheddar cheese and sour cream, or to taste.

I am Full of Beans

Congratulations. If you are reading this, you are thick skinned enough (or just down right curious) to keep reading after you saw the title of this post. But the title is perfect; I am full of beans, both literally and figuratively.

I have mentioned on this blog before how much I love beans. I cook with beans all the time. Beans are an inexpensive, versatile source of protein and fiber and are sooooo good for you. We eat so many beans in this household that I used to buy them in cans by the case. Then I started reading labels.

It turns out that beans, like almost every other processed food, start as health food and in the hands of food processors become junk. We eat mostly black beans, so I will give you a little nutritional comparison using them:

Bush's Best canned black beans (regular) - 1 cup
Calories: 210
Sodium: 860 m (36%)

Trader Joe's canned black beans (low sodium) - 1 cup
Calories: 220
Sodium: 350 m (15%)

Home cooked black beans (no salt) - 1 cup
Calories: 227
Sodium: 2 mg (0%)

So then, you can see what my problem is with canned black beans. You think you are making a healthy choice for your family by serving them beans, but in every cup you are giving them nearly 900 m of sodium in a food that is naturally sodium free. Why do food processors do that? It makes me so mad!

Now that I know the truth about canned beans, I won't use them anymore. Instead I cook my own and freeze them in 1 can size portions. Beans are insanely easy to make and freeze beautifully. Go ahead and give it a try.

Freezer Black Beans (makes 12 cups cooked, or 6 2-cup portions)
Note that I make 2 pounds at a time because my large pot holds 2 pounds fairly well. Increase or decrease the amount you make as your pot demands.
2 pounds dried black beans, picked over
water to cover and cook

Add dried black beans to a large bowl and cover with cool, fresh water. Cover with a tea towel and let sit overnight.

In the morning, drain the water from the bowl and rinse the beans in cool water. Add the beans to a large pot and cover with as much water as you can get in the pot. Cover and set over high heat. Once the pot comes to a boil, boil until just tender (not mushy), about 45 - 60 minutes. Turn off the heat and let the beans rest until they are cool enough to handle. Once cooled, drain beans and gently rinse with cold water.

Pack your cooked beans in 2 cup portions (this is roughly equivalent to one can of prepared beans) in zip top bags and freeze.

Homemade Almond Milk

A few months ago I noticed a change in my husband. He started eating salad, lots and lots of salad. Then he began asking for almond milk. We tried lots and lots of different brands and finally decided to make our own. Making our own almond milk isn't any cheaper (it runs about the same price as commercially prepared), but the almond pulp that remains behind is an excellent baking ingredient (I use it instead of almond meal - it is the same texture, but removes some fat and flavor from the meal - all of which is good in my baking) so it is cheaper for us in the long run.

Before you decide to give almond milk (or any other alternative milk product) a try, it is important to understand the differences between the various kinds of milk. Here is a handy chart that I found on a a blog called Noshtopia.


What you will notice from this chart is that cows milk wins, hands on, on the protein front. If you are using milk as your main source of protein, then stick with the moo juice. However, if you are getting enough protein from other sources, then non-dairy milks have lots of advantages. For us, choosing almond milk (it wins for this family on taste) means lower calories, carbs and sugar while still providing us with plenty of calcium. It is also easy (and fun) to make. I hope you give it a try.

Almond Milk (make approx 7 cups)

2 C water (to soak almonds)
2 C raw organic almonds
6 C filtered water
2 T agave syrup (or 4 pitted dates)
pinch salt, if desired

Add almonds to bowl and cover with 2 C water. Refrigerate almonds and let them set overnight.

When you are ready to make the milk, drain the almonds and rinse with clear water. Add 1/2 of the almonds to a blender along with 3 cups of filtered water and 1/2 of your sweetener of choice. Turn your blender on liquefy and process for 2 minutes.

Once the milk is blended, pour your mixture into a nut milk bag which has been set over a large bowl (if you don't have a nut milk bag, use a few layers of fine cheesecloth). Slowly squeeze the almond milk out of the bag. Keep squeezing gently until there is no milk left in the bag (you will have almond pulp leftover). Repeat the blending/squeezing with the second half of the ingredients. Pour milk into a pitcher and taste. If needed, add a pinch of salt to taste.

Cover with plastic wrap and store in refrigerator. The almond milk will keep, refrigerated, for 4 days.

Here's a nifty YouTube video (its not me, but they do a good job explaining the process)

Saucy and Spicy Overnight Beans

Chris has been craving baked beans. I made some a few weeks ago and he has been begging for them since. I love cooking beans - they are cheap, easy to make, incredibly good for you and can be made in a multitude of ways. I was going to make my usual beans up this weekend, but decided to give a little shout out to Saucy Mama and whip up a batch using a few of their products. The resulting beans were delish. You should give them a try!

Saucy and Spicy Overnight Beans (makes 12 side dish servings)

4 oz bacon, diced
1/2 large onion, diced
1 clove garlic, crushed
1 C strong black coffee
3/4 C ketchup
1/2 C molasses
1/3 C dark agave nectar (or 1/2 C brown sugar)
1/4 C Saucy Mama Chipotle Mustard
1 T Saucy Mama Hot Wing Sauce
2 T red wine vinegar
2 T worchestershire sauce
juice of half a lemon
1/4 t liquid smoke
1/4 t dried oregano
1/2 t chili powder
5 C water
1 lb dried navy or great northern beans, picked over

Heat a medium frying pan over med-high heat. Add bacon and fry until most of the fat is rendered, about 5 minutes. Add onions and saute until soft, about 5 minutes more. Add garlic and saute approximately 30 seconds or until garlic is fragrant. Set aside.


In a large bowl, combine all the remaining ingredients except beans and stir until smooth.


Add dried beans, onion/bacon mixture and the sauce to a large crockpot. Set the pot to high and cook 12 hours (or overnight) or until the beans are tender. If you like, season with salt and pepper to taste before serving, but I didn't find they needed either.

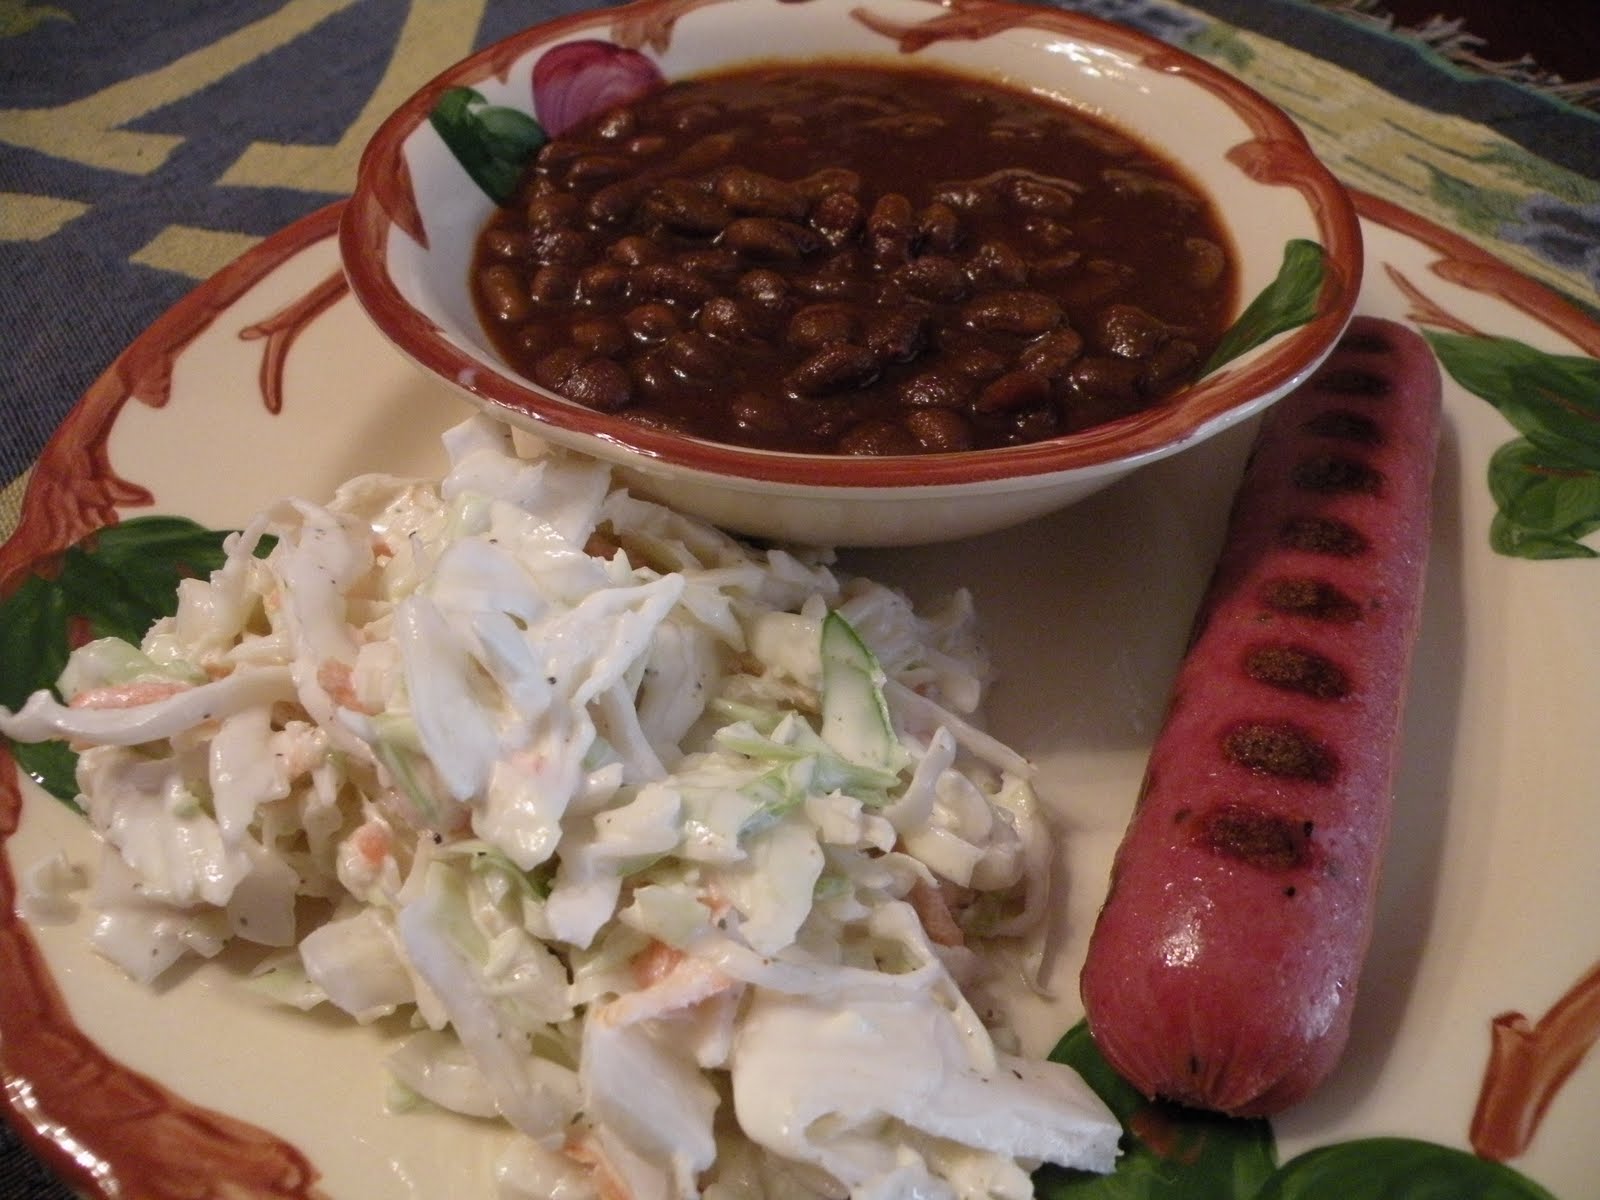
I served our beans tonight with grilled sausages and crisp slaw. It was the perfect Labor Day dinner.


More salad....Classic Italian with Creamy Basil and Romano dressing

Tonight I made the kids and Chris Italian sausages (organic, from the farmer's market of course!) with steamed broccoli for dinner. Mmmmmm.....those sausages smelled so goooooood. But alas, while staring at the four lovely, grease covered links I thought about my daily intake of veggies. Basically, it was non-existent, unless you count the red pepper hummus I had while lunching with the kids at Target. No chicken/fennel/greasy goodness for me tonight. Tonight I need salad.

Since the house was full of Italian yumminess, I decided on a classic Italian salad. I had all the greenery fixings, but lacked a substantial dressing. I sat for a moment and started dreaming about my favorite Italian salad - the house salad at Ledo Pizza. Ledo makes this yum, yum, yummy Romano Cheese and Herb salad dressing. Could I replicate it with what I had in the fridge. I was about to find out.

Here is what I came up with from the available fixings in my fridge and pantry. It isn't quite Ledo pizza dressing, but it was close and tasted pretty darned good.

Creamy Basil and Romano Dressing (makes about 1 1/4 cups)
1/2 C good quality mayonnaise
1/4 C buttermilk
1/4 C fresh basil leaves
1/4 C grated Romano cheese (parm would be good too)
1 t dried Italian seasoning blend
1 clove garlic, crushed
1/4 t seasoned salt blend (or salt and pepper)

Add all ingredients to a food processor and blitz until basil is finely minced.

Here's the salad all dressed. It includes romaine hearts, grape tomatoes, red onion and a few pieces of salami wrapped in low sodium provolone. Yum.


A shout out to Wendy - a quick and easy healthy dinner

My friend Wendy is looking for quick and easy healthy meal ideas. Here is my shout out to her. This is actually what we ate for dinner last night. It was quick, easy and healthy. I served it to the kids with a quick, fresh fruit freeze (one peach, one cup strawberries, 1 1/2 cups chopped ice and 1 cup no sugar added fruit juice, all whirred up in the blender). They are yummy.


Quick and Easy Turkey Soft Tacos
(makes 8)

1 lb. ground turkey
3 heaping T homemade taco seasoning
1/2 t salt
1 C cooked black beans (if you use canned, rinse well)
3/4 C prepared tomato or marinara sauce
1/4 C water
8 low carb or whole wheat tortillas (I used Carb Balance by Mission)
Taco toppings as you like (we used shredded cabbage, no-salt added salsa, yogurt - the kids got shredded cheese)


Brown turkey in large skillet over medium high heat. Add taco seasoning, salt and black beans. Stir well to combine.


Once well mixed, add tomato sauce and water. Simmer for 10 minutes or until flavors are well combined.

Serve as directed above with your favorite taco toppings.

Fresh Peach "Milkshake" (aka Smoothy)


I am lucky. My children are still at an age where I can successfully lie to them when it is appropriate to do so. Tonight, they requested cereal for dinner. Since this is a non-meal in my opinion (cereal, by its very nature, is heavily processed and therefore not good for you) I wanted them to have something healthy to go with it. I made them Fresh Peach "Milkshakes" to go along with their dinner and they were delighted.

I can usually get away with calling a smoothy a milkshake when the fruit is sweet and super ripe. My kids can easily sniff out yogurt in the mix if I am using frozen or not quite ripe produce. Since my fruit bowl is over-flowing at the moment, I knew I would be able to pull it off today.

Everyone enjoyed the "milkshakes" tonight without question.


Fresh Peach "Milkshake" (makes 2)

3 small, very ripe peaches, pitted and peeled
1 C chopped ice
1 C whole milk plain yogurt
1/2 C 1% milk
1 T agave nectar (to taste as the sweetness of your fruit demands)

Add all ingredients to blender and mix well to combine.

Why do we buy pre-made salad dressing?

The longer I continue this clean eating experiment, the more mystified I am at our collective buying habits. This morning I made bleu cheese dressing and it took all of 3 minutes to whip up the batch. Why in the world did I ever buy the pre-made, highly processed, junk laden stuff before? There is absolutely no reason to buy the processed junk when it is so easy to make at home.

As you can see, my fridge currently contains 3 salad dressings, all homemade. The bleu cheese is in the large container at the rear. The other two are recipes already posted (buttermilk ranch and classic cobb dressing).


Bleu Cheese Dressing (makes approx 3 cups)

3/4 c mayonnaise
1/4 c milk (or half and half)
3/4 c sour cream
2 cloves garlic, crushed
1 T white wine vinegar
1 T dried parsley
1/4 t black pepper
1/2 t salt
6 oz crumbled bleu cheese

Add all ingredients, except cheese, to a bowl and whisk to combine. Add bleu cheese and toss gently. Pour into storage container and refrigerate until ready to use. Keeps up to 2 weeks in refrigerator.

The perfect low GI summer salad - the classic Cobb

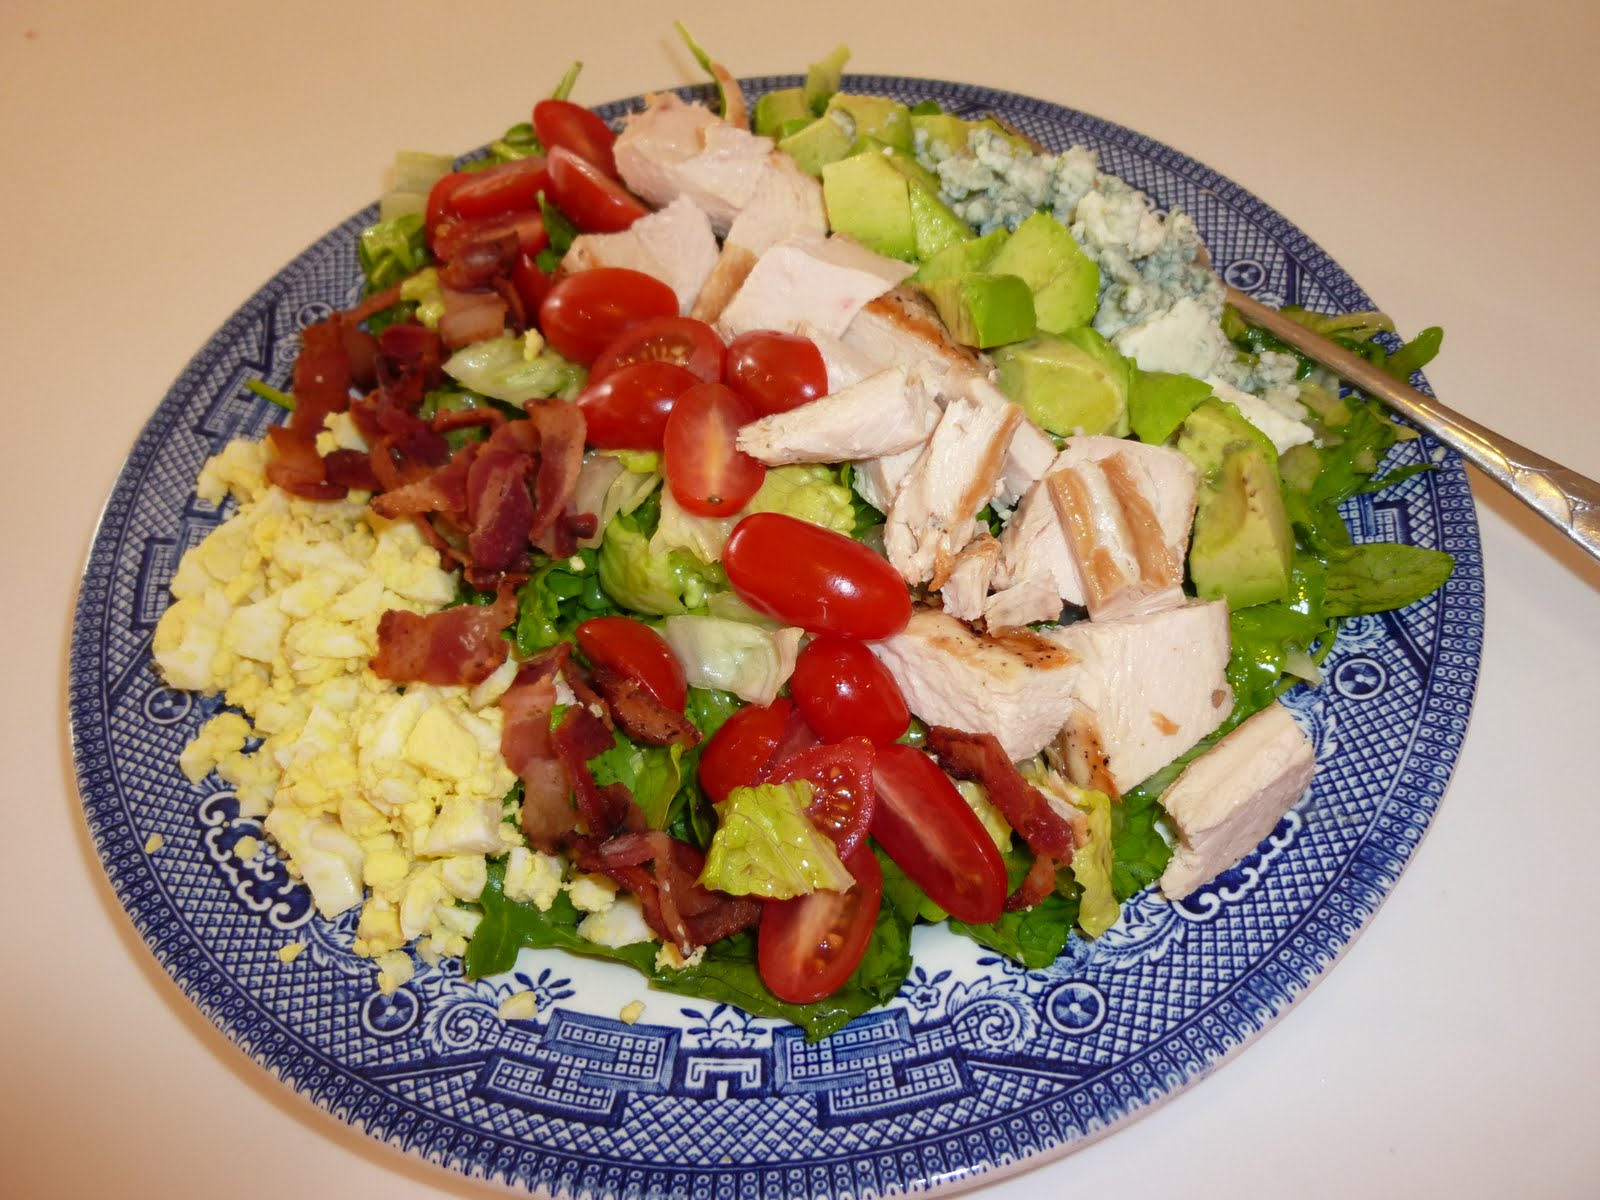
Today was cooking club and as I was the host, I got to choose the menu. We made the following:

1. Classic Cobb Salad
2. Cream of Fresh Tomato Soup
3. Good for You Zucchini Muffins (basically this recipe, but swap out 3/4 C of almond meal for the white flour)

Here is the Cobb Salad recipe that we made:

Classic Cobb Salad (serves 8)

1 head iceberg lettuce, washed and chopped
8 cups arugula, washed
2 small heads of romaine lettuce, washed and chopped
1 lb grape tomatoes
3/4 lb bacon, fried, drained and chopped
4 chicken breasts, cooked and chopped
8 hard boiled eggs, chopped
4 small avocados, diced
2 cups crumbled blue cheese
2 cups (approx) Cobb Salad Dressing (see below)

Mix lettuces together. Add dressing, to taste, and toss to combine. Arrange in large salad bowl or plate.

Arrange remaining ingredients in strips on top of the greens and enjoy.

Cobb Salad Dressing (makes approx 3 cups)

1/2 C water
1/2 C red wine vinegar
1/2 T sugar
2 t freshly squeezed lemon juice
1 T + 1 t salt
1 1/2 t pepper
1 1/2 t Worcestershire sauce
1/2 t dry mustard
2 cloves garlic, finely minced
1 C olive oil
1 C canola oil.

Add all ingredients in large jar or other container and blend well. Mix before serving.

Decisions, decisions....

Tonight was salad night at our house. I had intended to try a recipe for Cafe Rio Creamy Tomatillo Dressing that I found online at a great blog called Kalyn's Kitchen. In order to make it, I needed to make a Buttermilk Ranch dressing first, as the Tomatillo dressing using it as a base. So, after making both dressings my kids informed me that they would not, under any circumstances, eat their chicken tenders with anything other than Honey Mustard. Of course, I was out of that so made yet another dressing for the table.

All of these were good, but the Tomatillo is especially nice. If you prefer, you can use a pre-made ranch dressing as the base (but homemade is much better for you.)

Homemade Buttermilk Ranch Dressing (adapted from this recipe at Simply Recipes)

1 c buttermilk
1 c mayonnaise
1 t lemon juice
1/4 t paprika
1/4 t mustard powder
1/2 t salt
1/8 t black pepper
1 t dried parsley
1 t dried dill (or dill/lemon mix)
1 green onion, sliced
Add all ingredients to food processor or blender and process until smooth.
Makes about 2 cups. Keeps for a week, covered in the fridge.

Cafe Rio Creamy Tomatillo Dressing (adapted from Kalyn's Kitchen)

2 c prepared Ranch Dressing
1 small bunch cilantro, large stems removed (about 1/2 cup chopped cilantro)
2 large or 4 small tomatillos
1/2 t minced garlic
2 T lime juice
1 t green tobasco sauce

Add all ingredients to food processor or blender and process until smooth.

Makes about 2 1/2 cups. Keeps for a week, covered in the fridge.

Quick Honey Mustard Dressing (My kids eat this stuff by the boatload. They dip anything and everything into it and I bet they would eat it by the spoonful if I let them.)

2 c mayonnaise
3 T prepared mustard
3 T honey or agave nectar

Add all ingredients to a bowl and whisk to combine.

Makes about 2 cups. Keeps for one week, covered in the fridge.